Chances are that you already have a central database with all your employees like Google Workspace, Microsoft Azure or an HR database. If this system supports SCIM (System for Cross-domain Identity Management) you can automatically add/remove uses from Nestr when you add remove them there.
All you need to do is go to your workspace settings:
There, if you have not already, go to 'User Permissions' and select 'Allow email users from certain domains to join this workspace' and enter all domains, comma separated, you use when provisioning users. Note that once added, we'll do a manual verification on our end to ensure claimed domains actually match the workspace. We'll email you once this is completed (usually within an hour).

Once your domains are verified, enable the SCIM integration on your integrations page on your workspace settings:
For the rest of this article we'll use Azure as the example SCIM provider but the basics are the same for other providers.
In your Azure portal go to 'Enterprise applications' and click '+ New application'
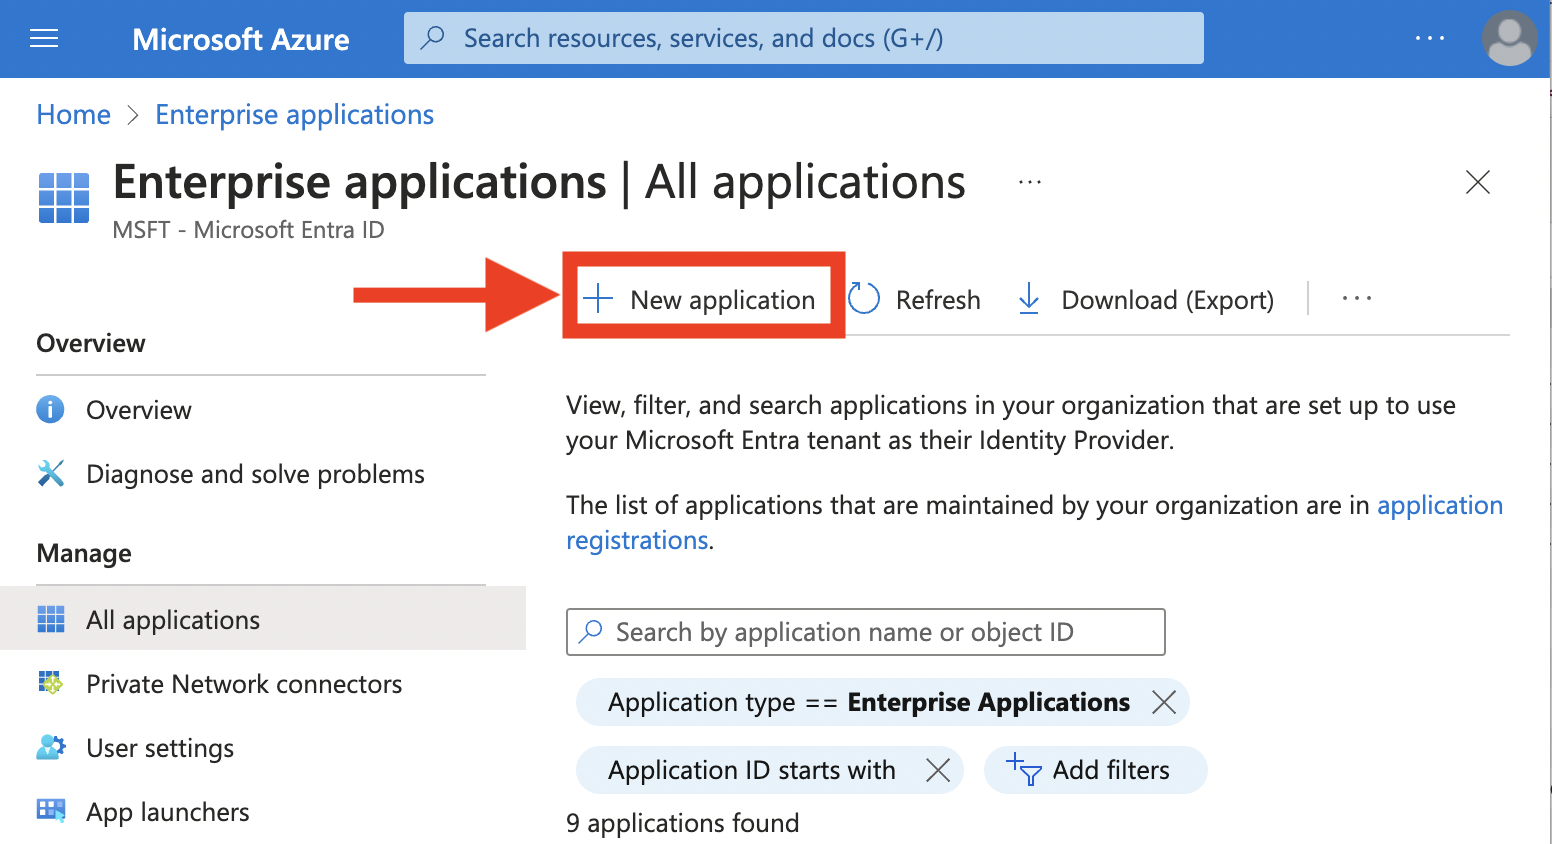
When creating an application click '+ Create your own application', give it a name (eg. Nestr.io) and choose the option 'Integrate any other application you don't find in the gallery (Non-gallery)'.
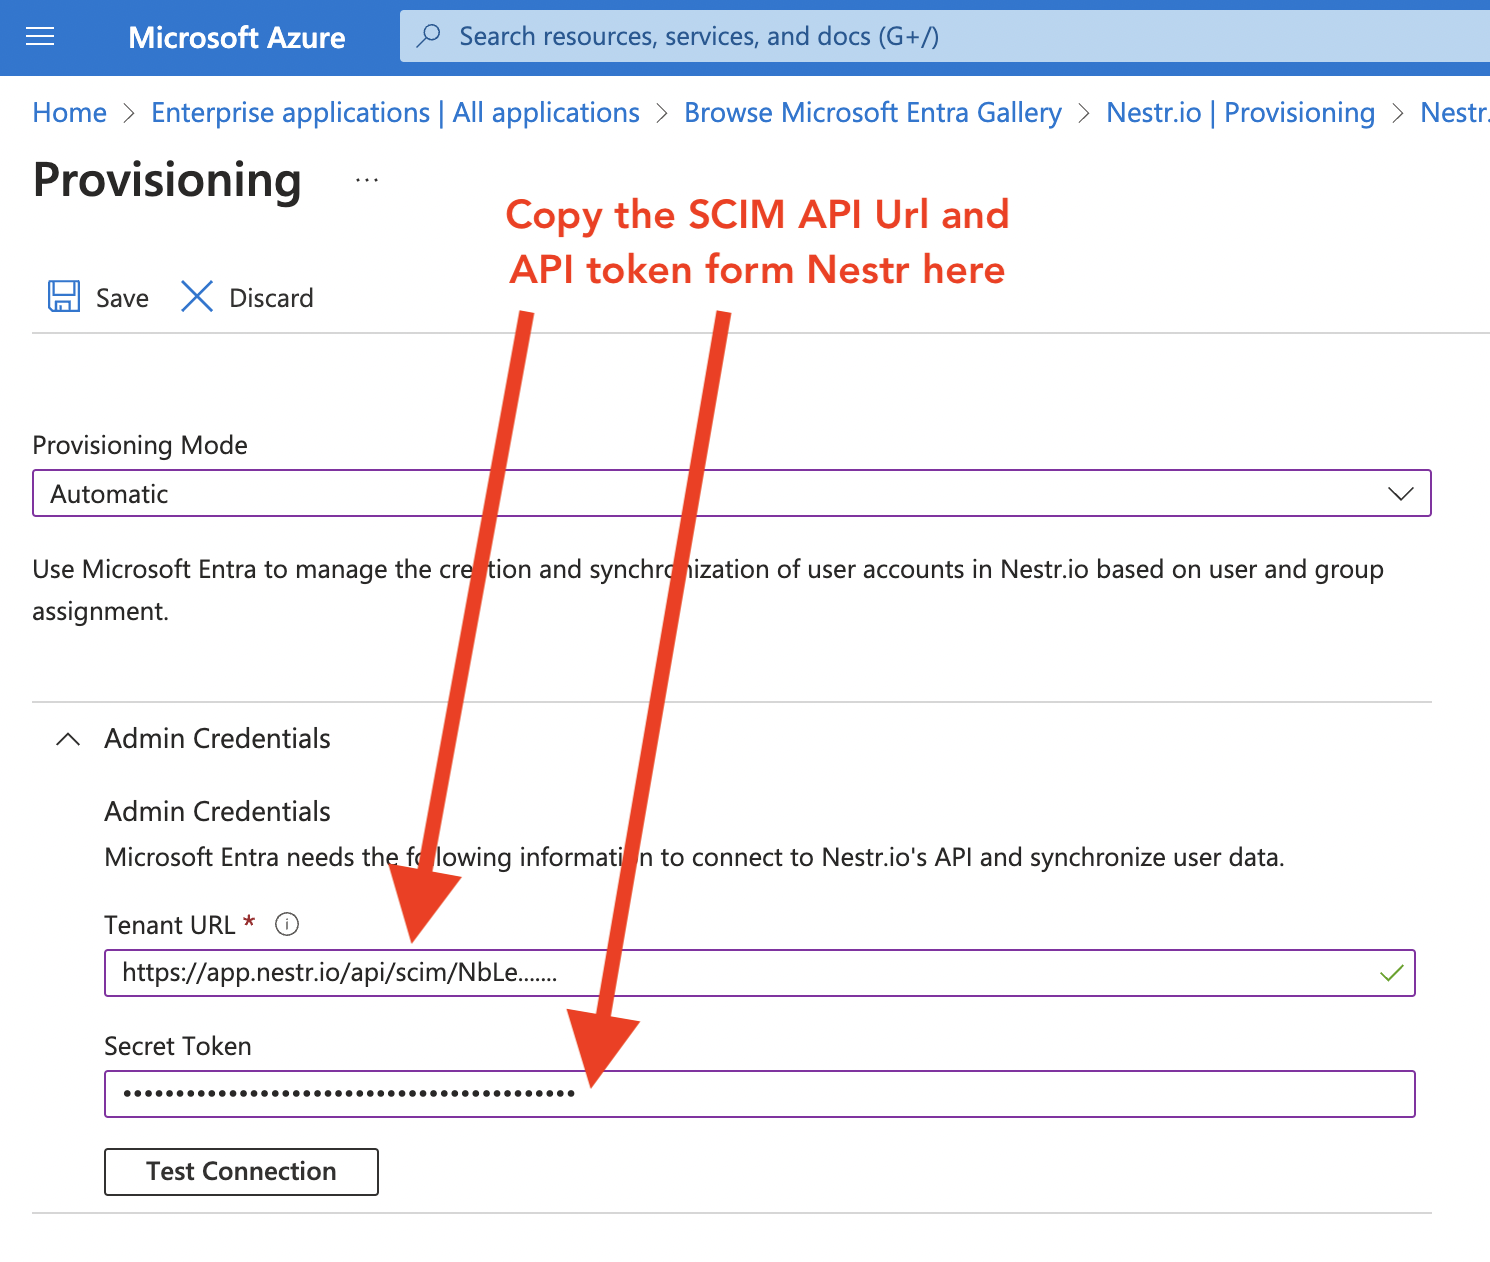
When created assign the correct users and/or groups to your new Enterprise application and under 'Manage' to to 'provisioning'. Select 'Automatic' as the provisioning mode. Go back to Nestr and copy the SCIM API Url and paste it into the Tenant URL field under 'Admin Credentials'. Copy the API key from Nestr and paste it in the 'Secret Token' field. Click 'Test connection' to see if the configuration works. If it does, click 'Save'.
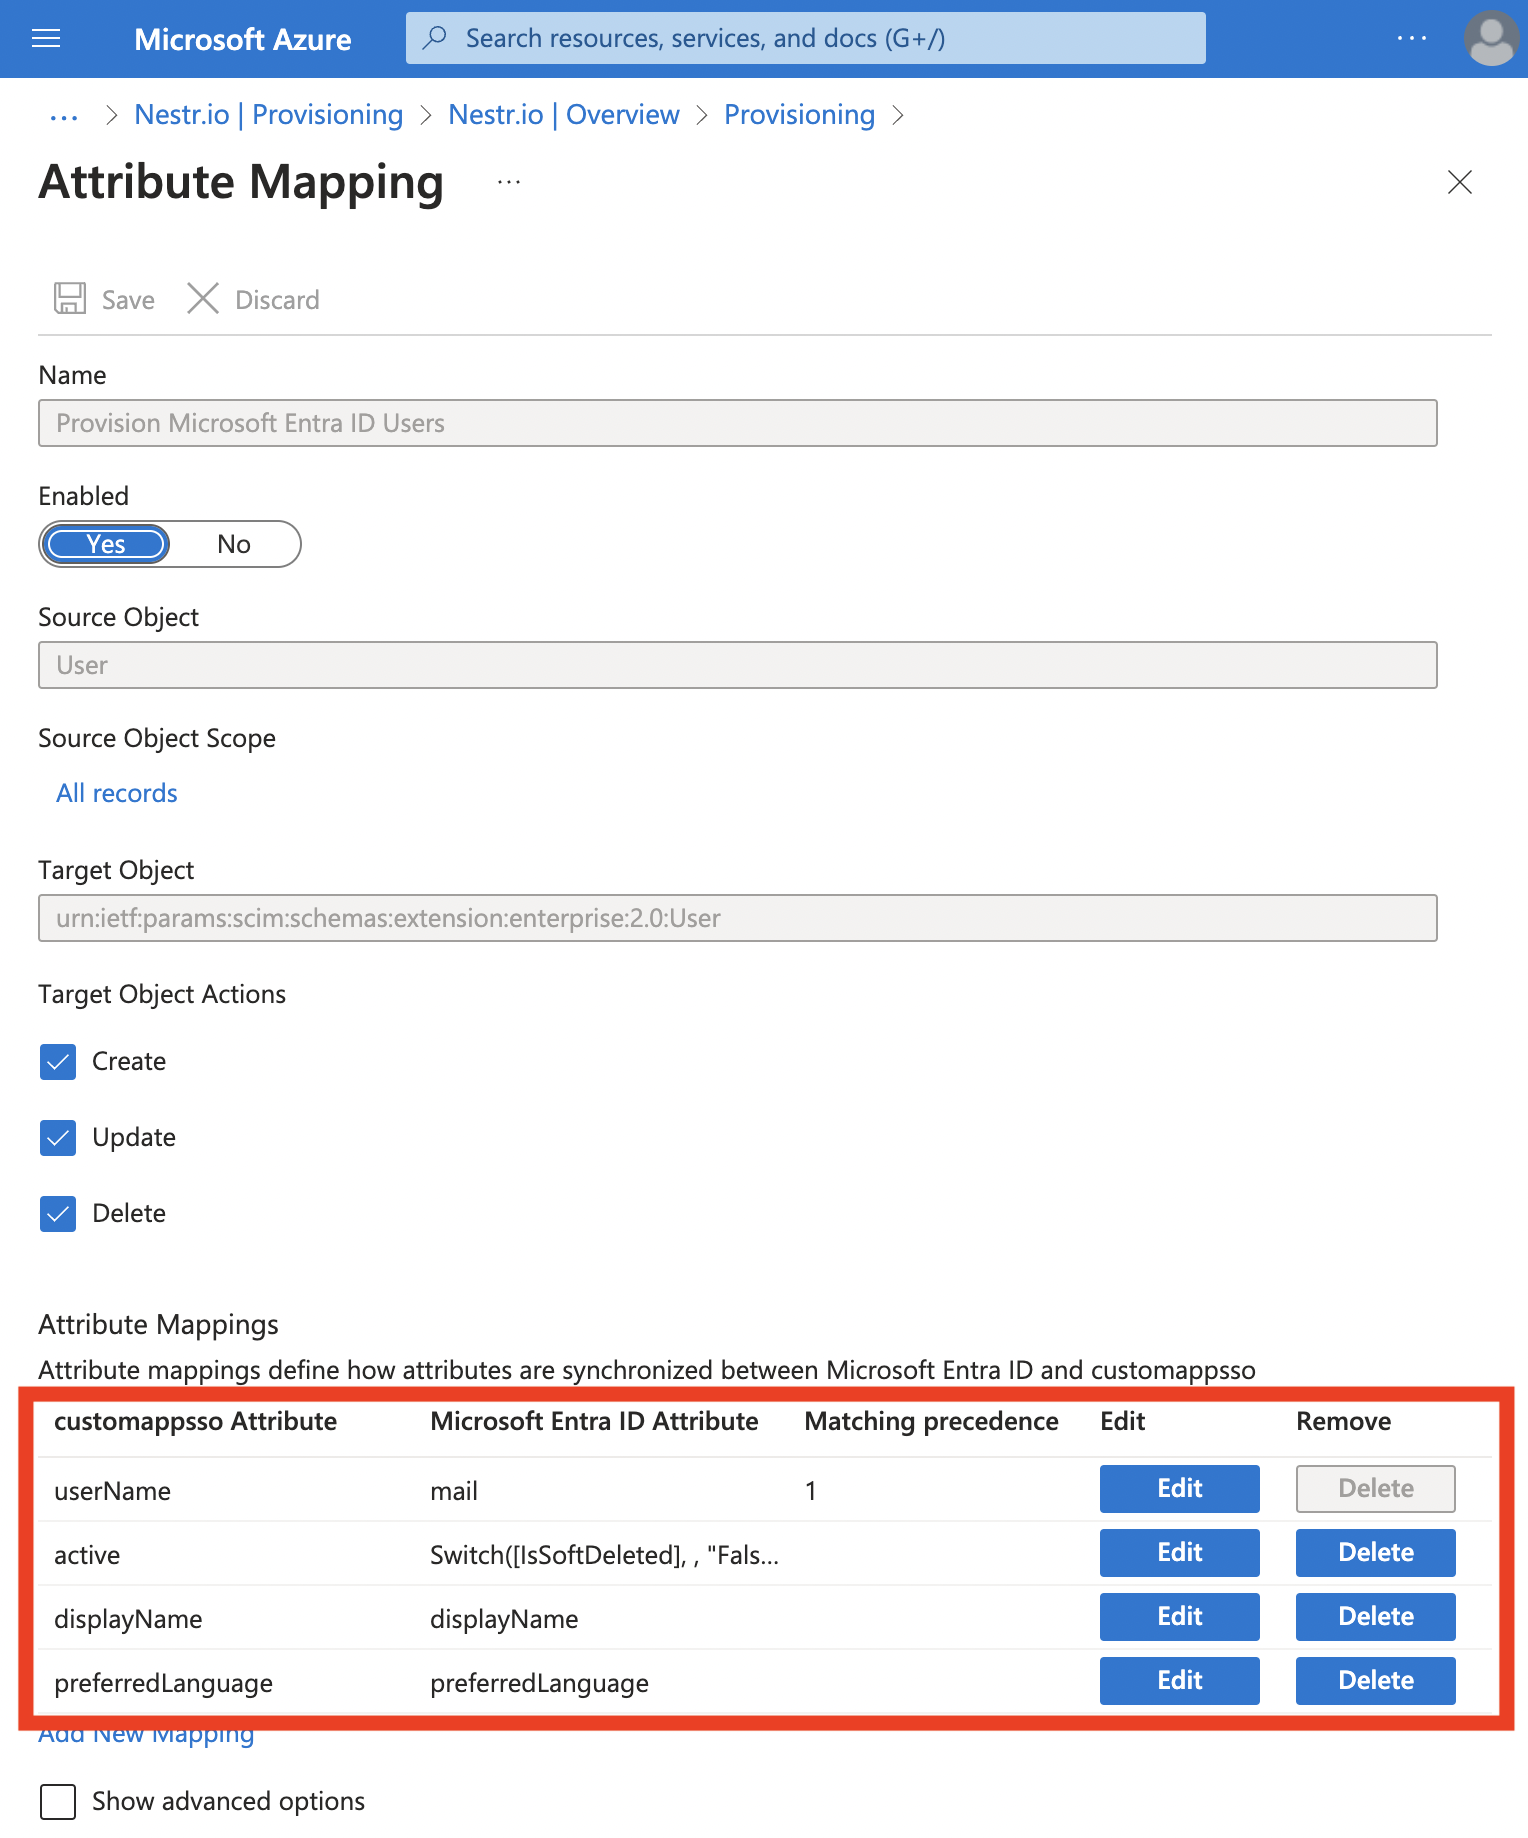
On the same page, open the 'Mappings' segment and click 'Provision Microsoft Entra ID Users'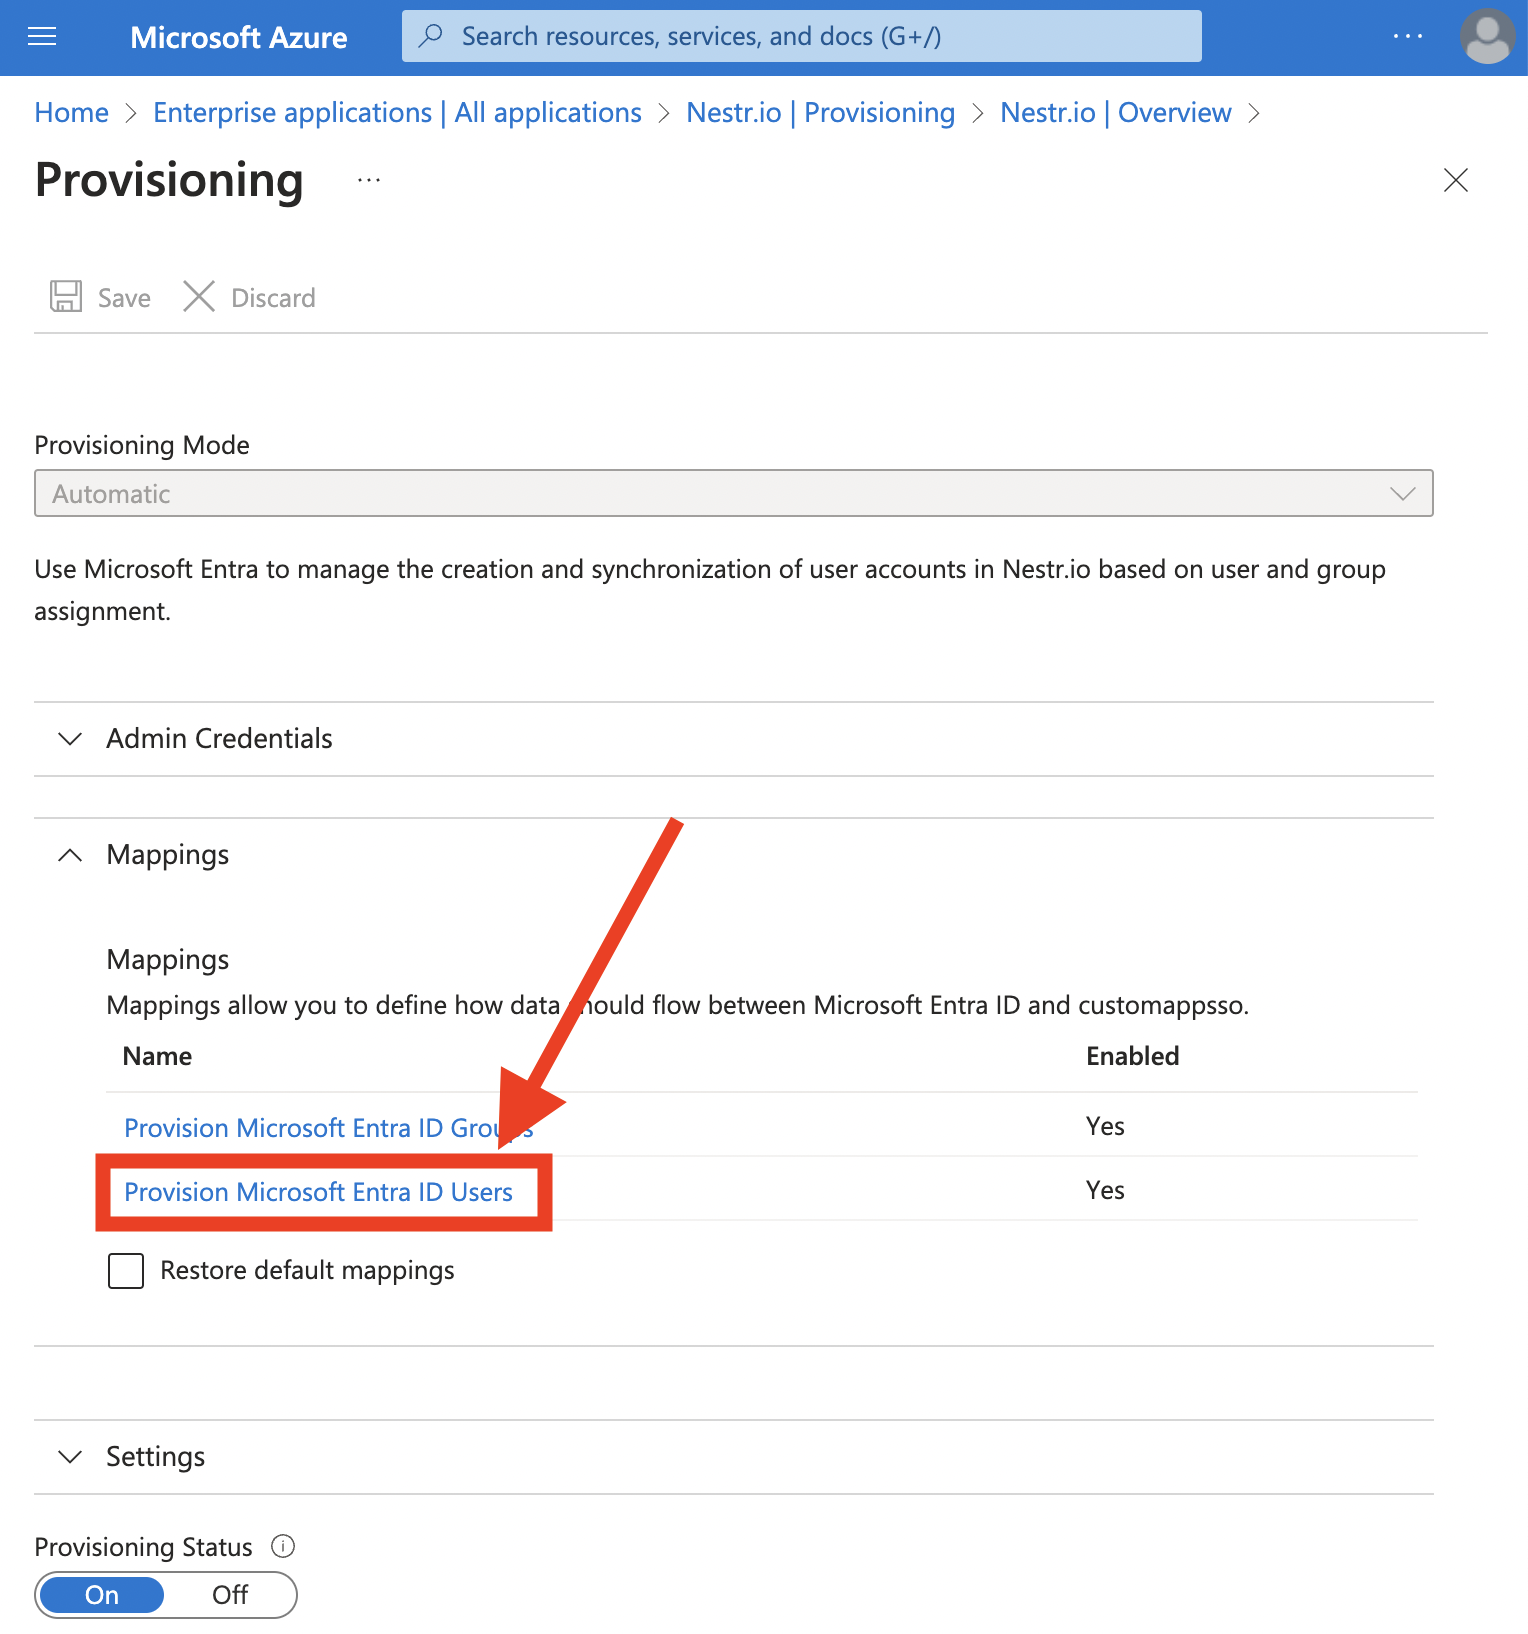
There you can setup what information will be send across to Nestr. You can remove most fields and only leave the following mappings (note that userName may also be mapped to userPrincipalName). Click Save, close the settings window.
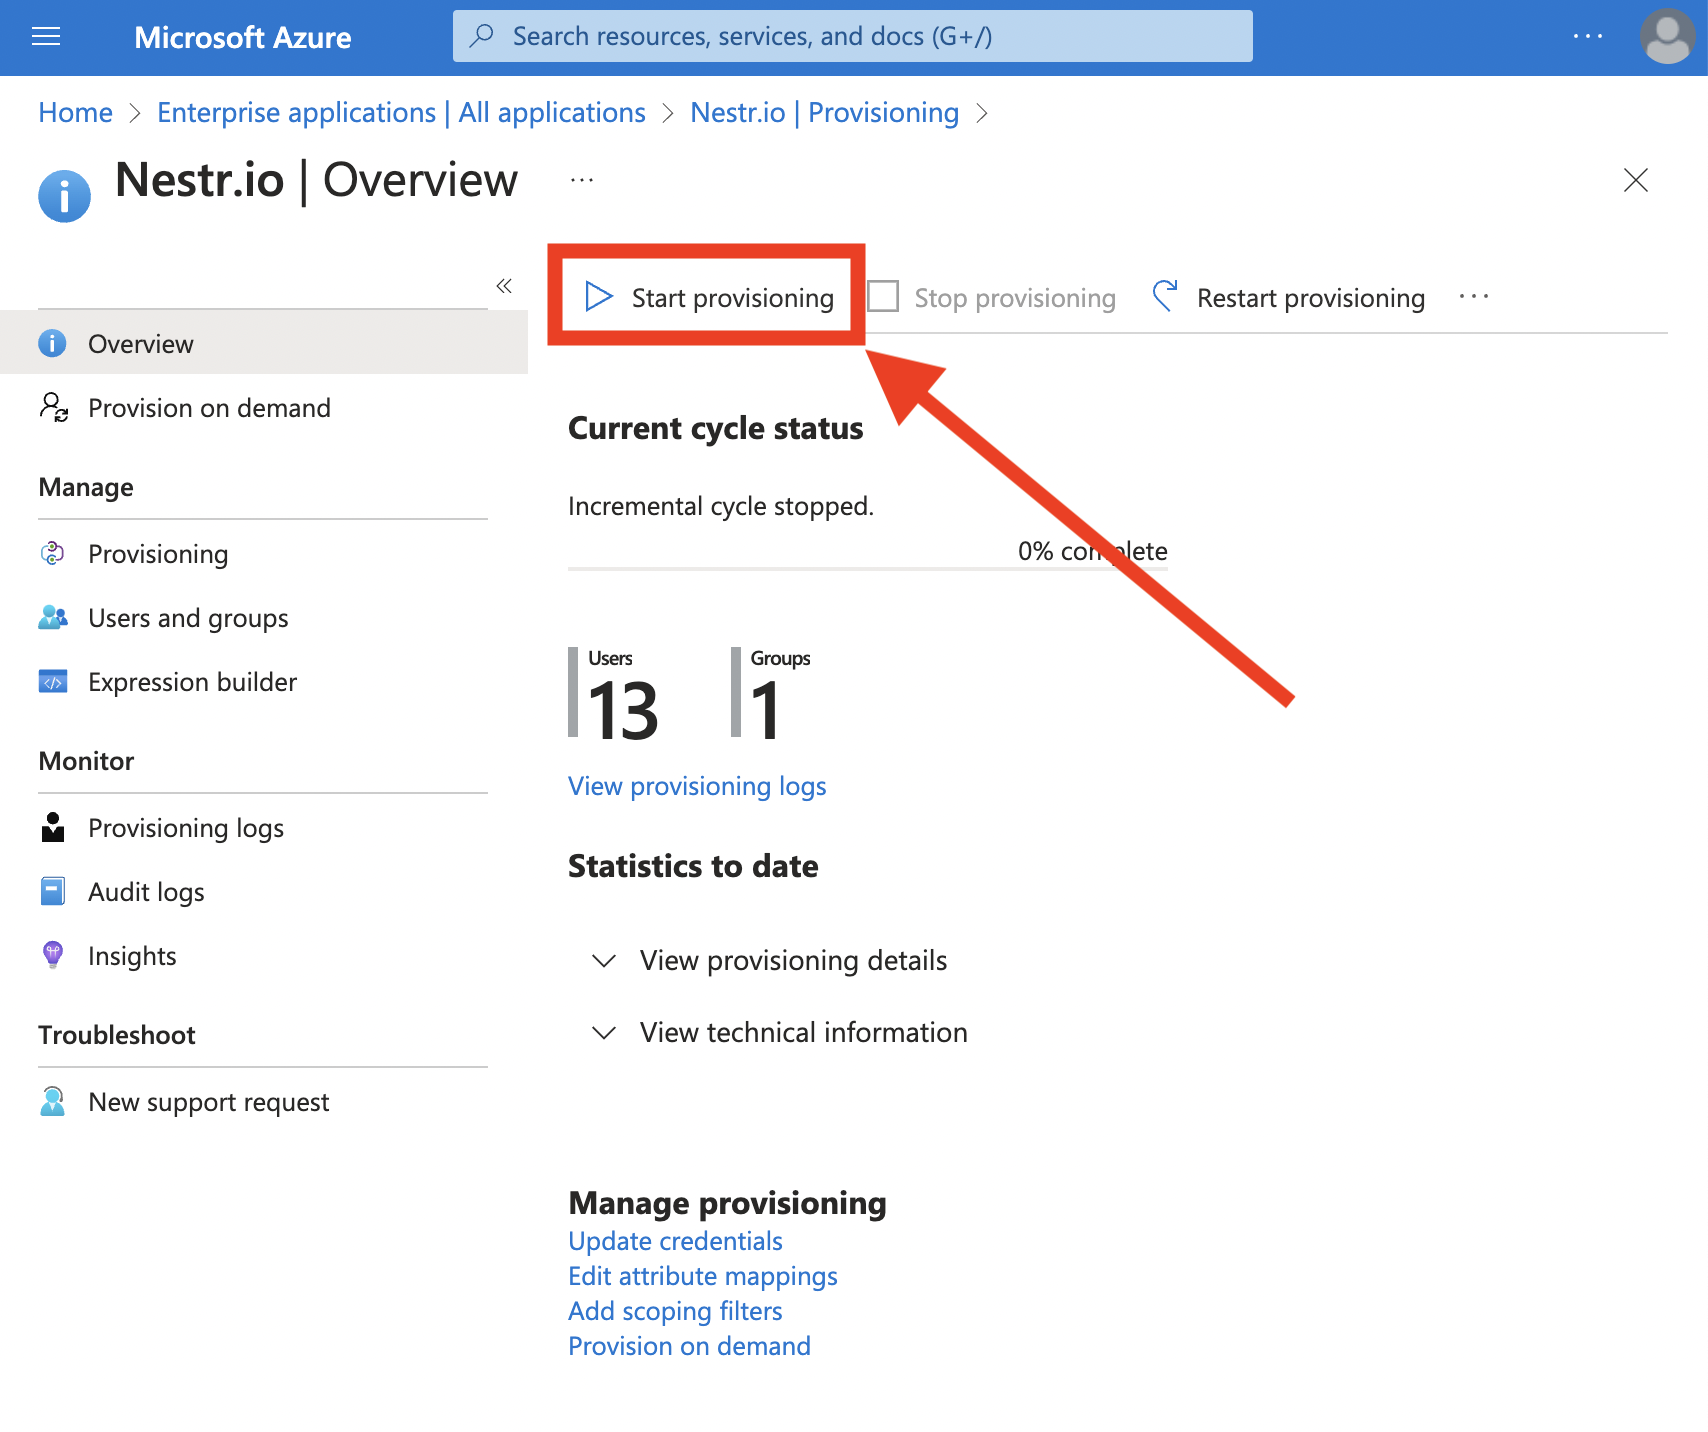
Now click 'Start provisioning' and all your users will be added to Nestr. Any user added to the users configured for access to the Enterprise application in Azure, will automatically be added to Nestr and any user removed, will be removed from Nestr. Note that this provisioning setup seamlessly works with our Google, Microsoft and SAML login methods as well.