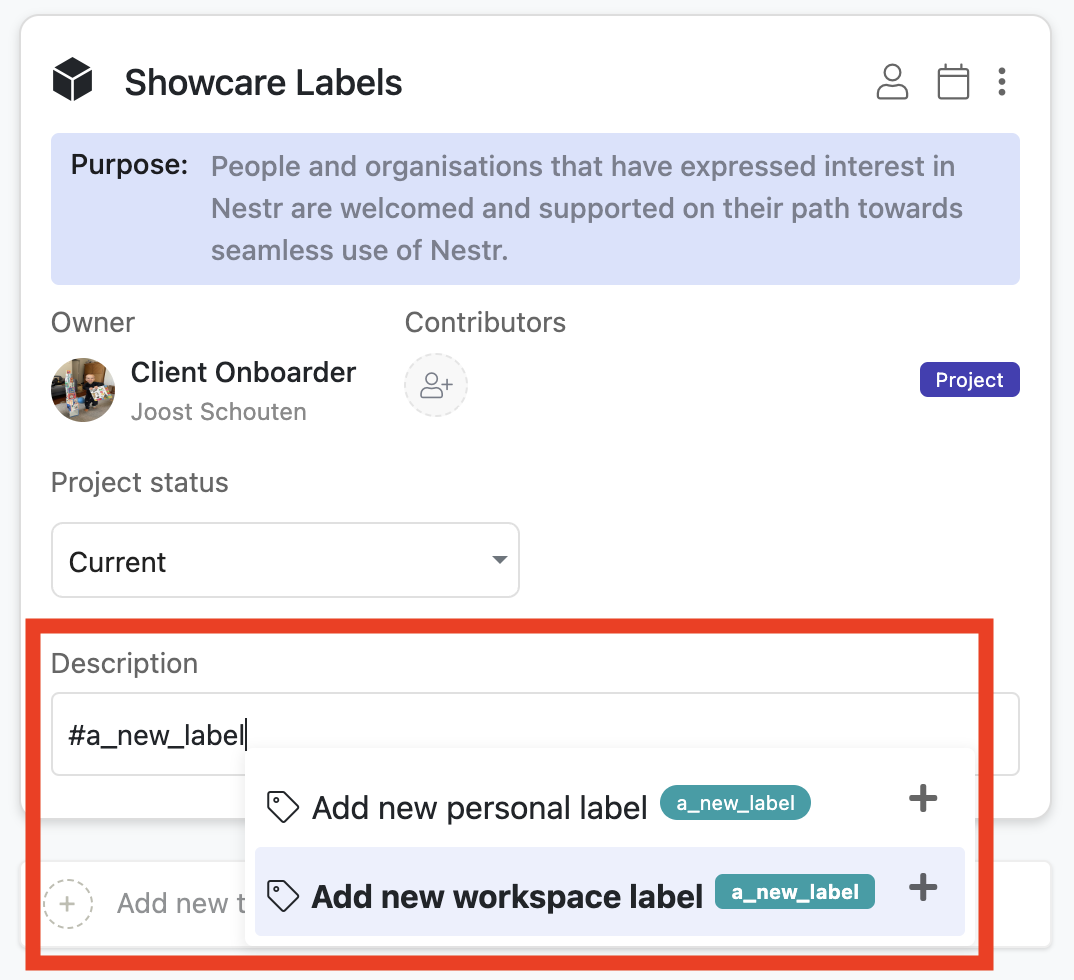
You can customise Nestr to suit your needs in many different ways and Labels are at the center of this. You can add a label simply by typing #name_of_label in the name, description or purpose field of any Nest (role/circle/project...) you interact with. If the label does not exist yet, you can create it right there and then.
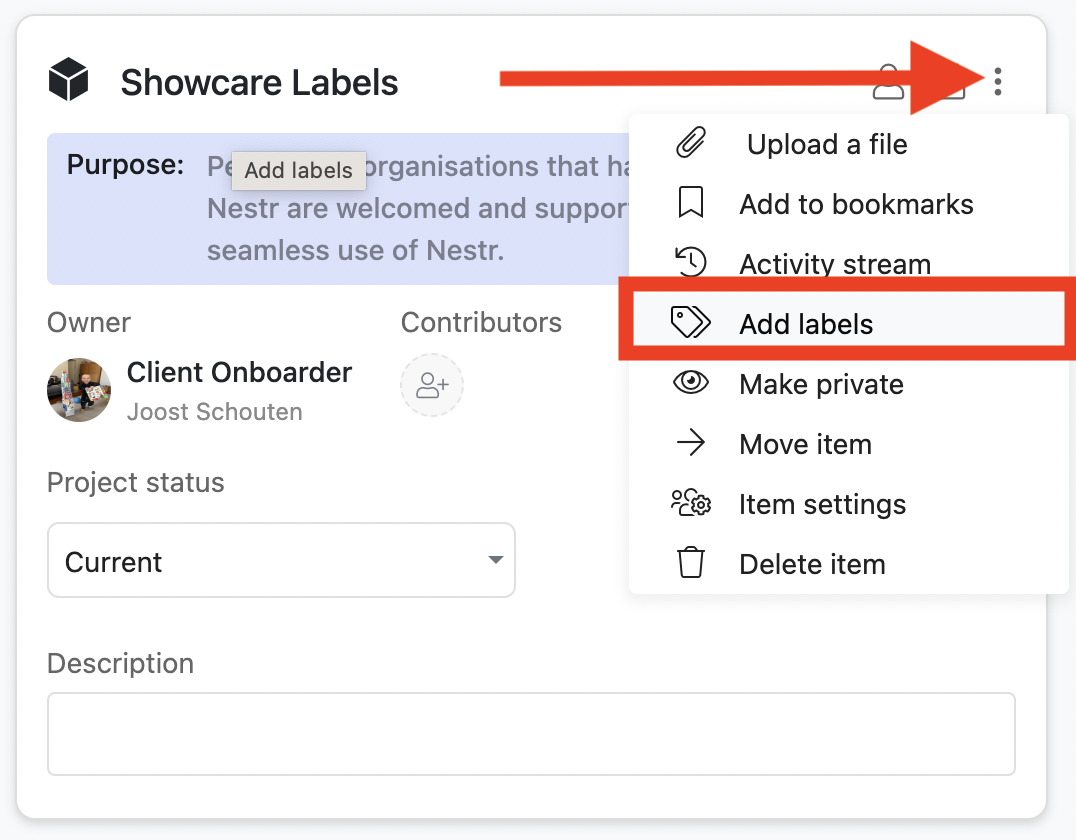
You can also add labels anywhere you see the three dots.
As you can see, you can create a personal or workspace label. There are actually three types of labels.
Three types of Labels
In Nestr you can add labels to almost everything and there are three types of labels:
- System labels: These are labels Nestr offers out of the box (eg. #project)
- Workspace labels: These are labels you can create and use within a certain workspace.
- User labels: These are personal labels you can use across all workspaces you have access to and will only be visible to you, even in your shared workspaces.
Labels to categorise your work & organisation
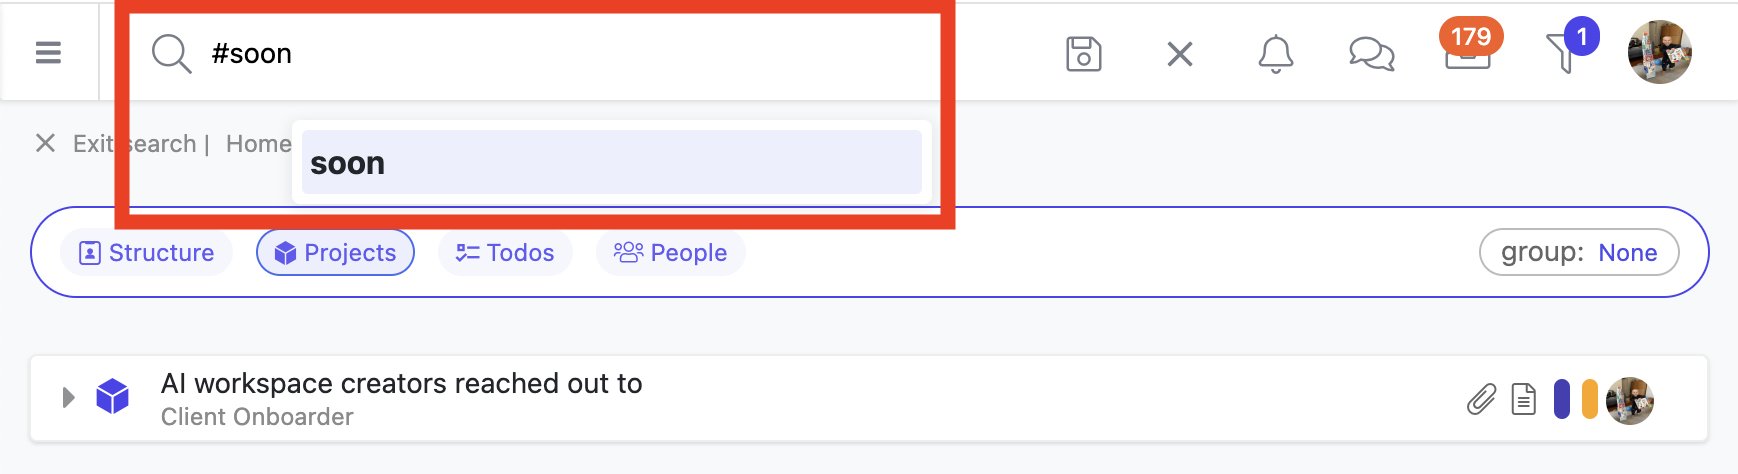
You can use labels in a few different ways. The can help you categorise and organise your work and organisation. Once assigned, you can easily search for any project/circle/role/etc. with your label by typing #your_label in the search field.
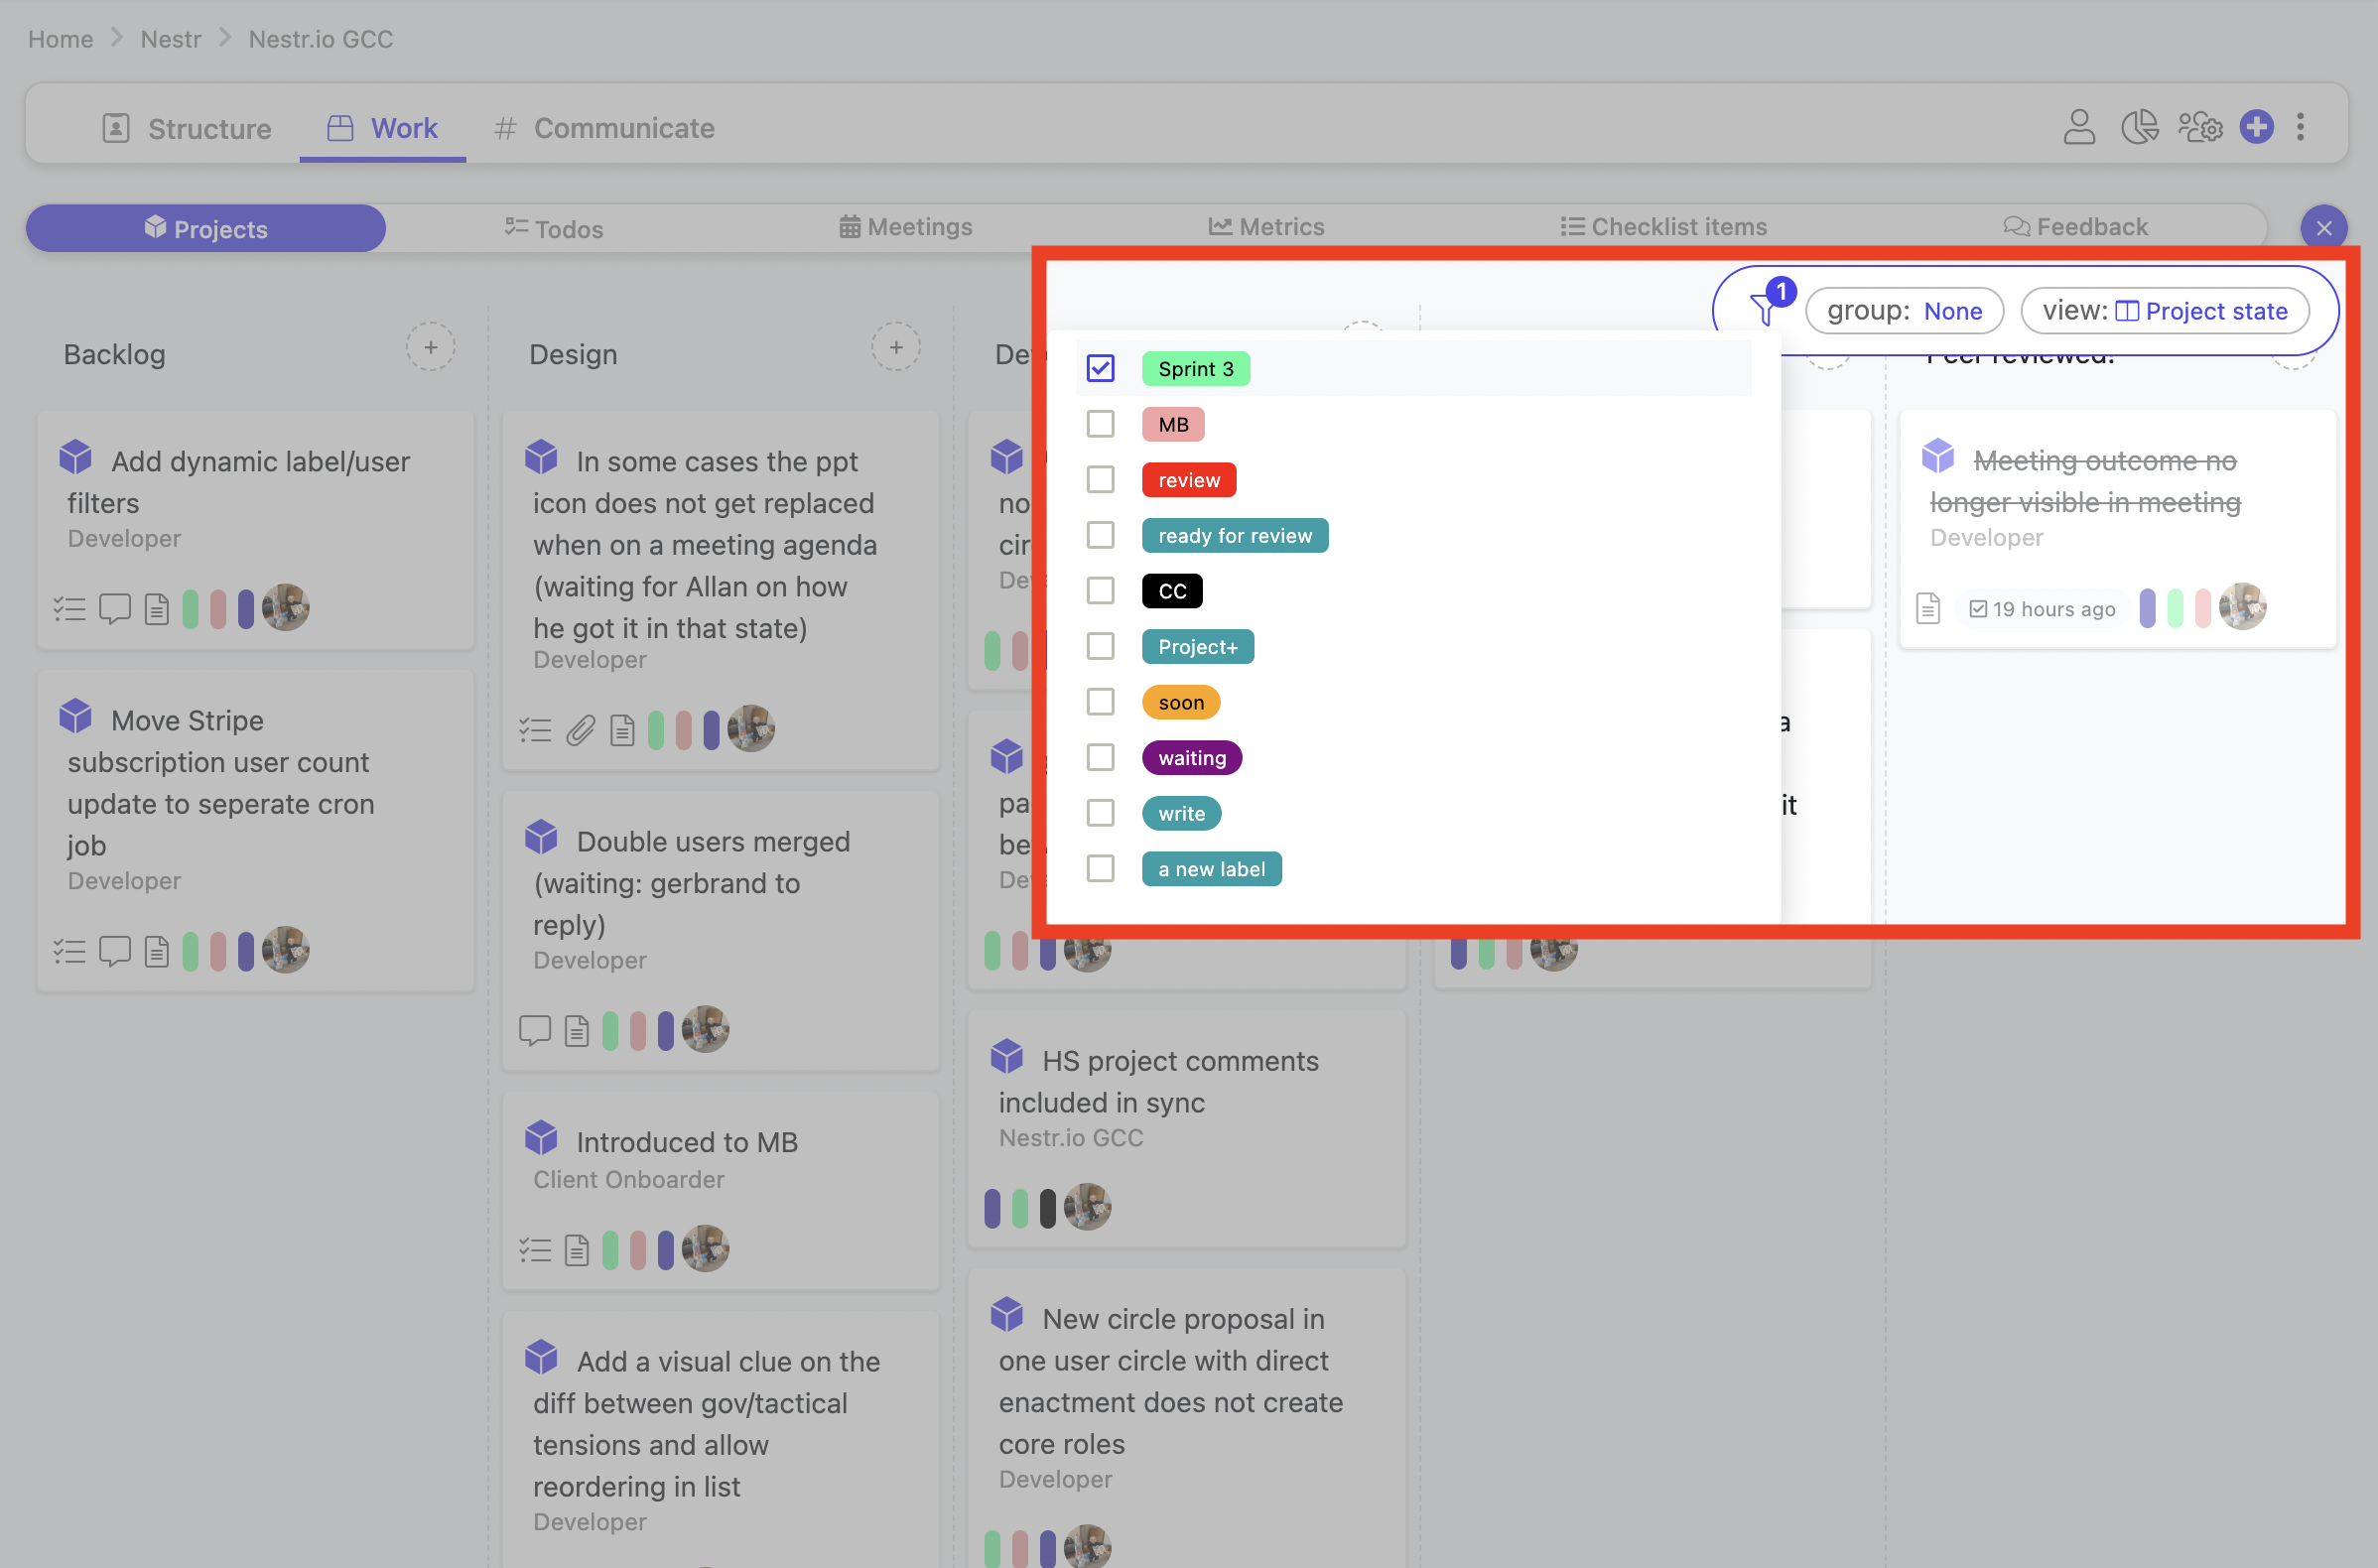
Also, almost all pages offer a way to filter on used labels. So your circle or role project board allows you to filter on certain labels so you can create focus. This is great for running a sprint where you label your sprint work with the label 'sprint_3' and filter on just that label for the duration of your sprint.
Labels to customize Nestr
Labels also allow you to customise how Nestr works. If you go to your workspace settings you'll see a "Labels & Fields" tab where you can create and edit all workspace labels and some system labels.
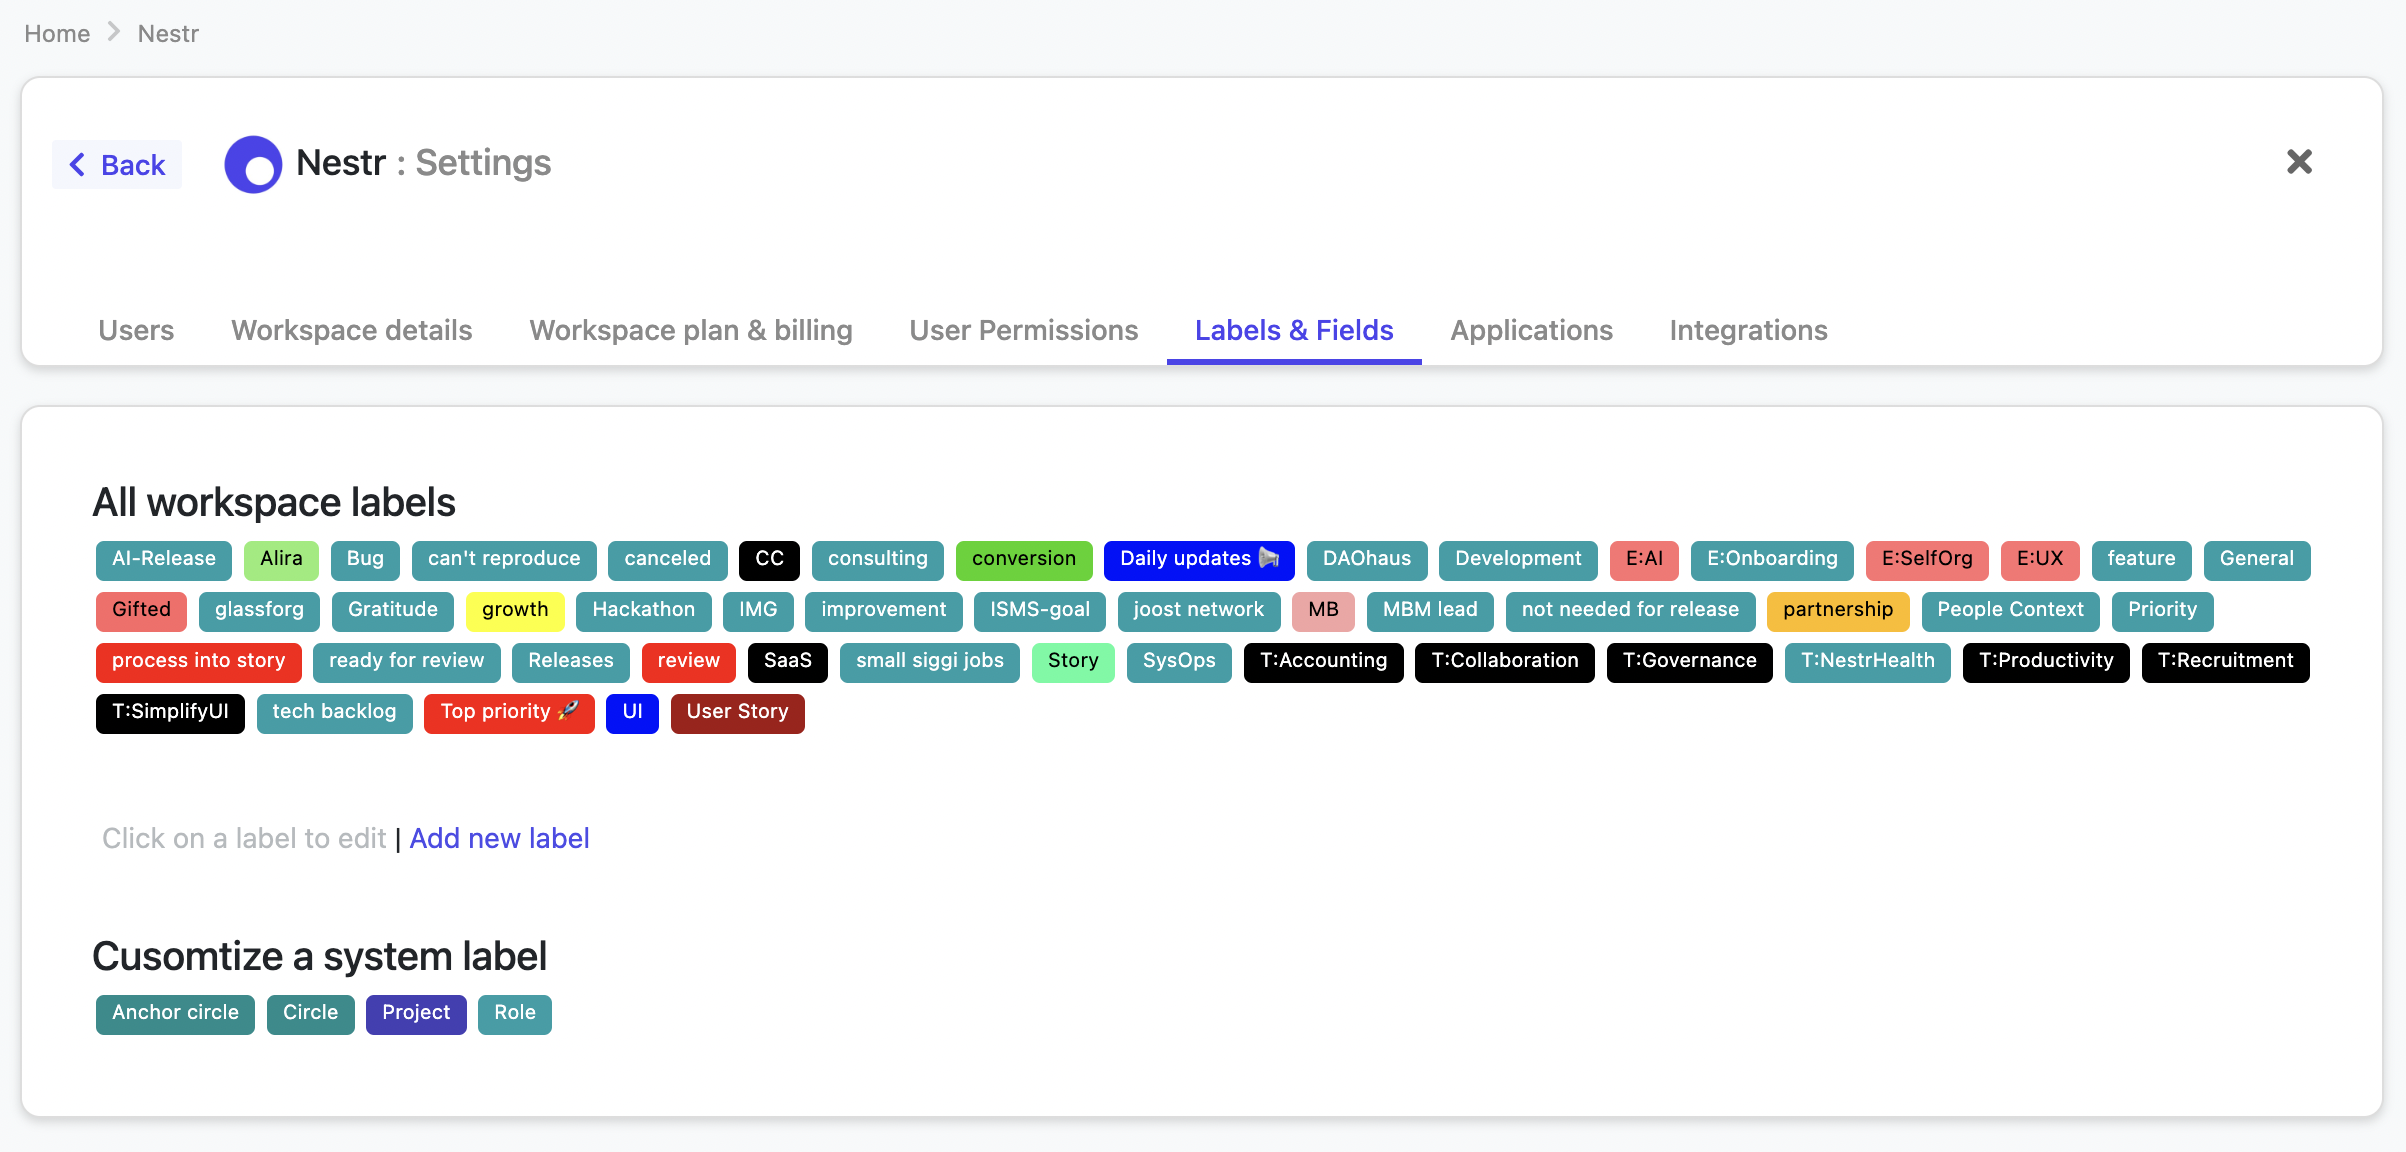
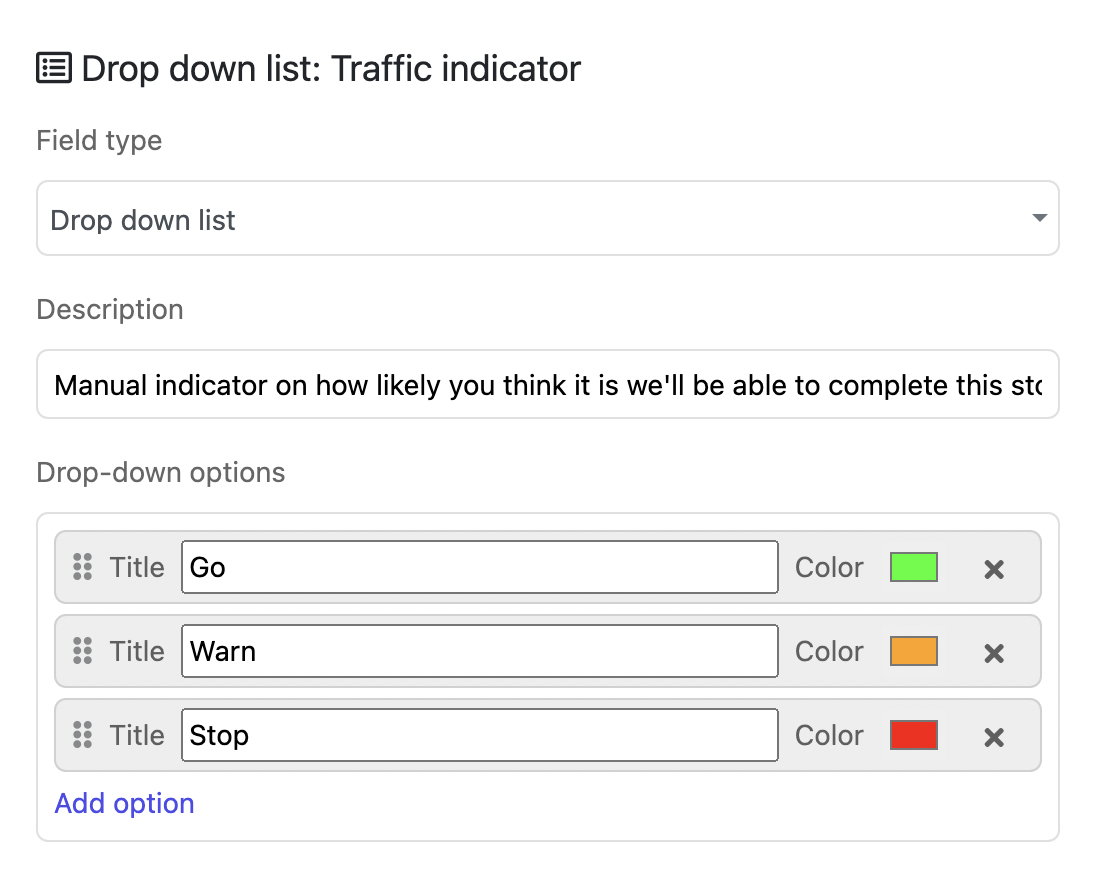
If you click on any of the workspace labels you can edit the label name, color and add fields as well. Any field you define here will be added to all projects, roles, circles, etc. you have added this label to. This gets really powerful and you can add as many fields as you would like. At current you can add text, multiline text, number, currency, select, percentage and slider fields.
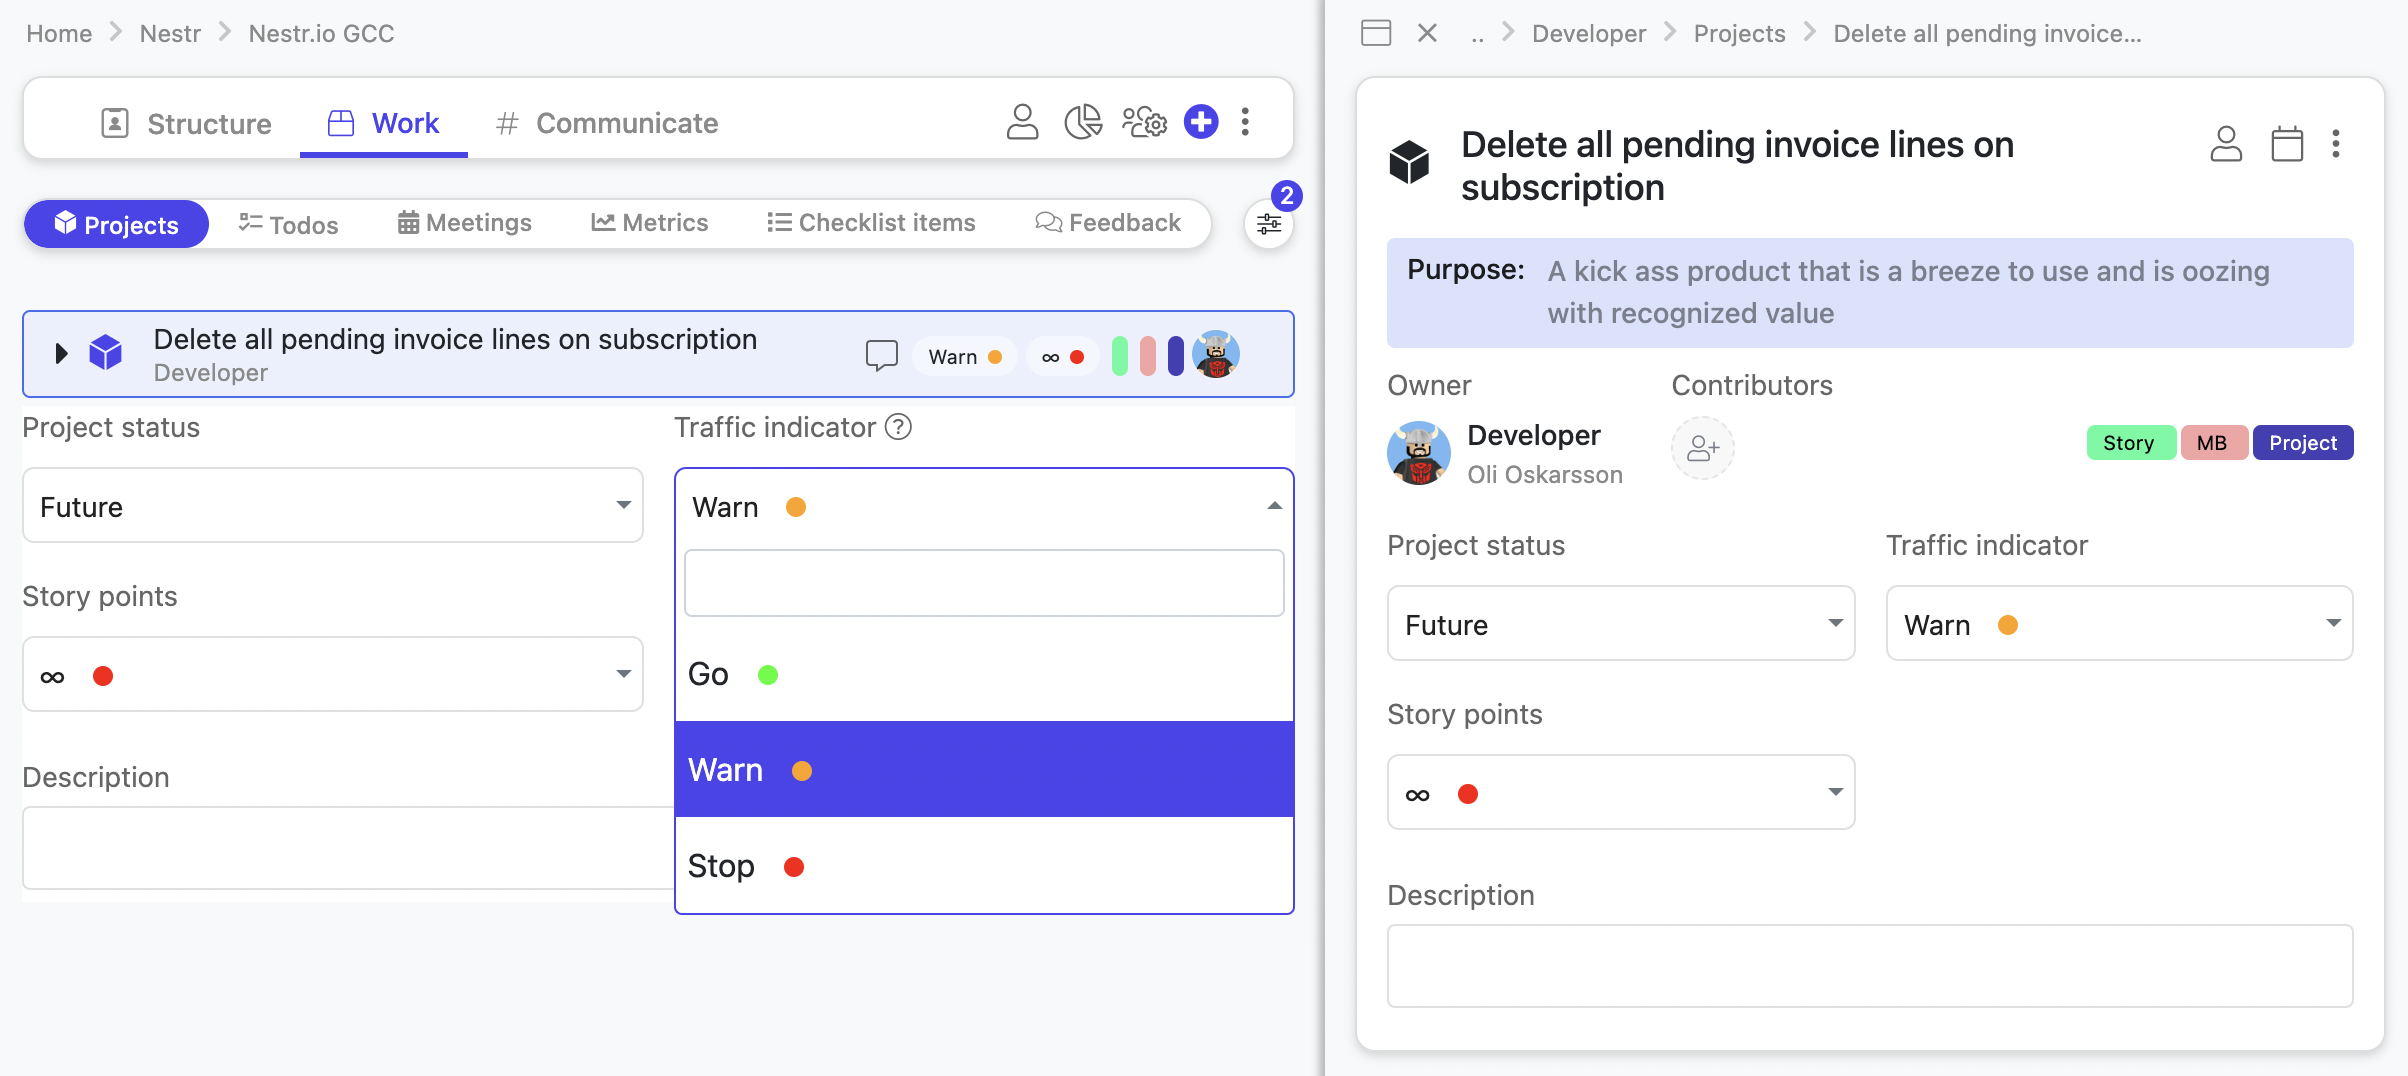
Then whenever you use a label, the fields will automatically get added to what you have added the label to. Here is an example of a 'Story' label where we added a story points and a traffic light field. Note that the values of the fields show up in both the detail view as well as the list view.
Extending system labels
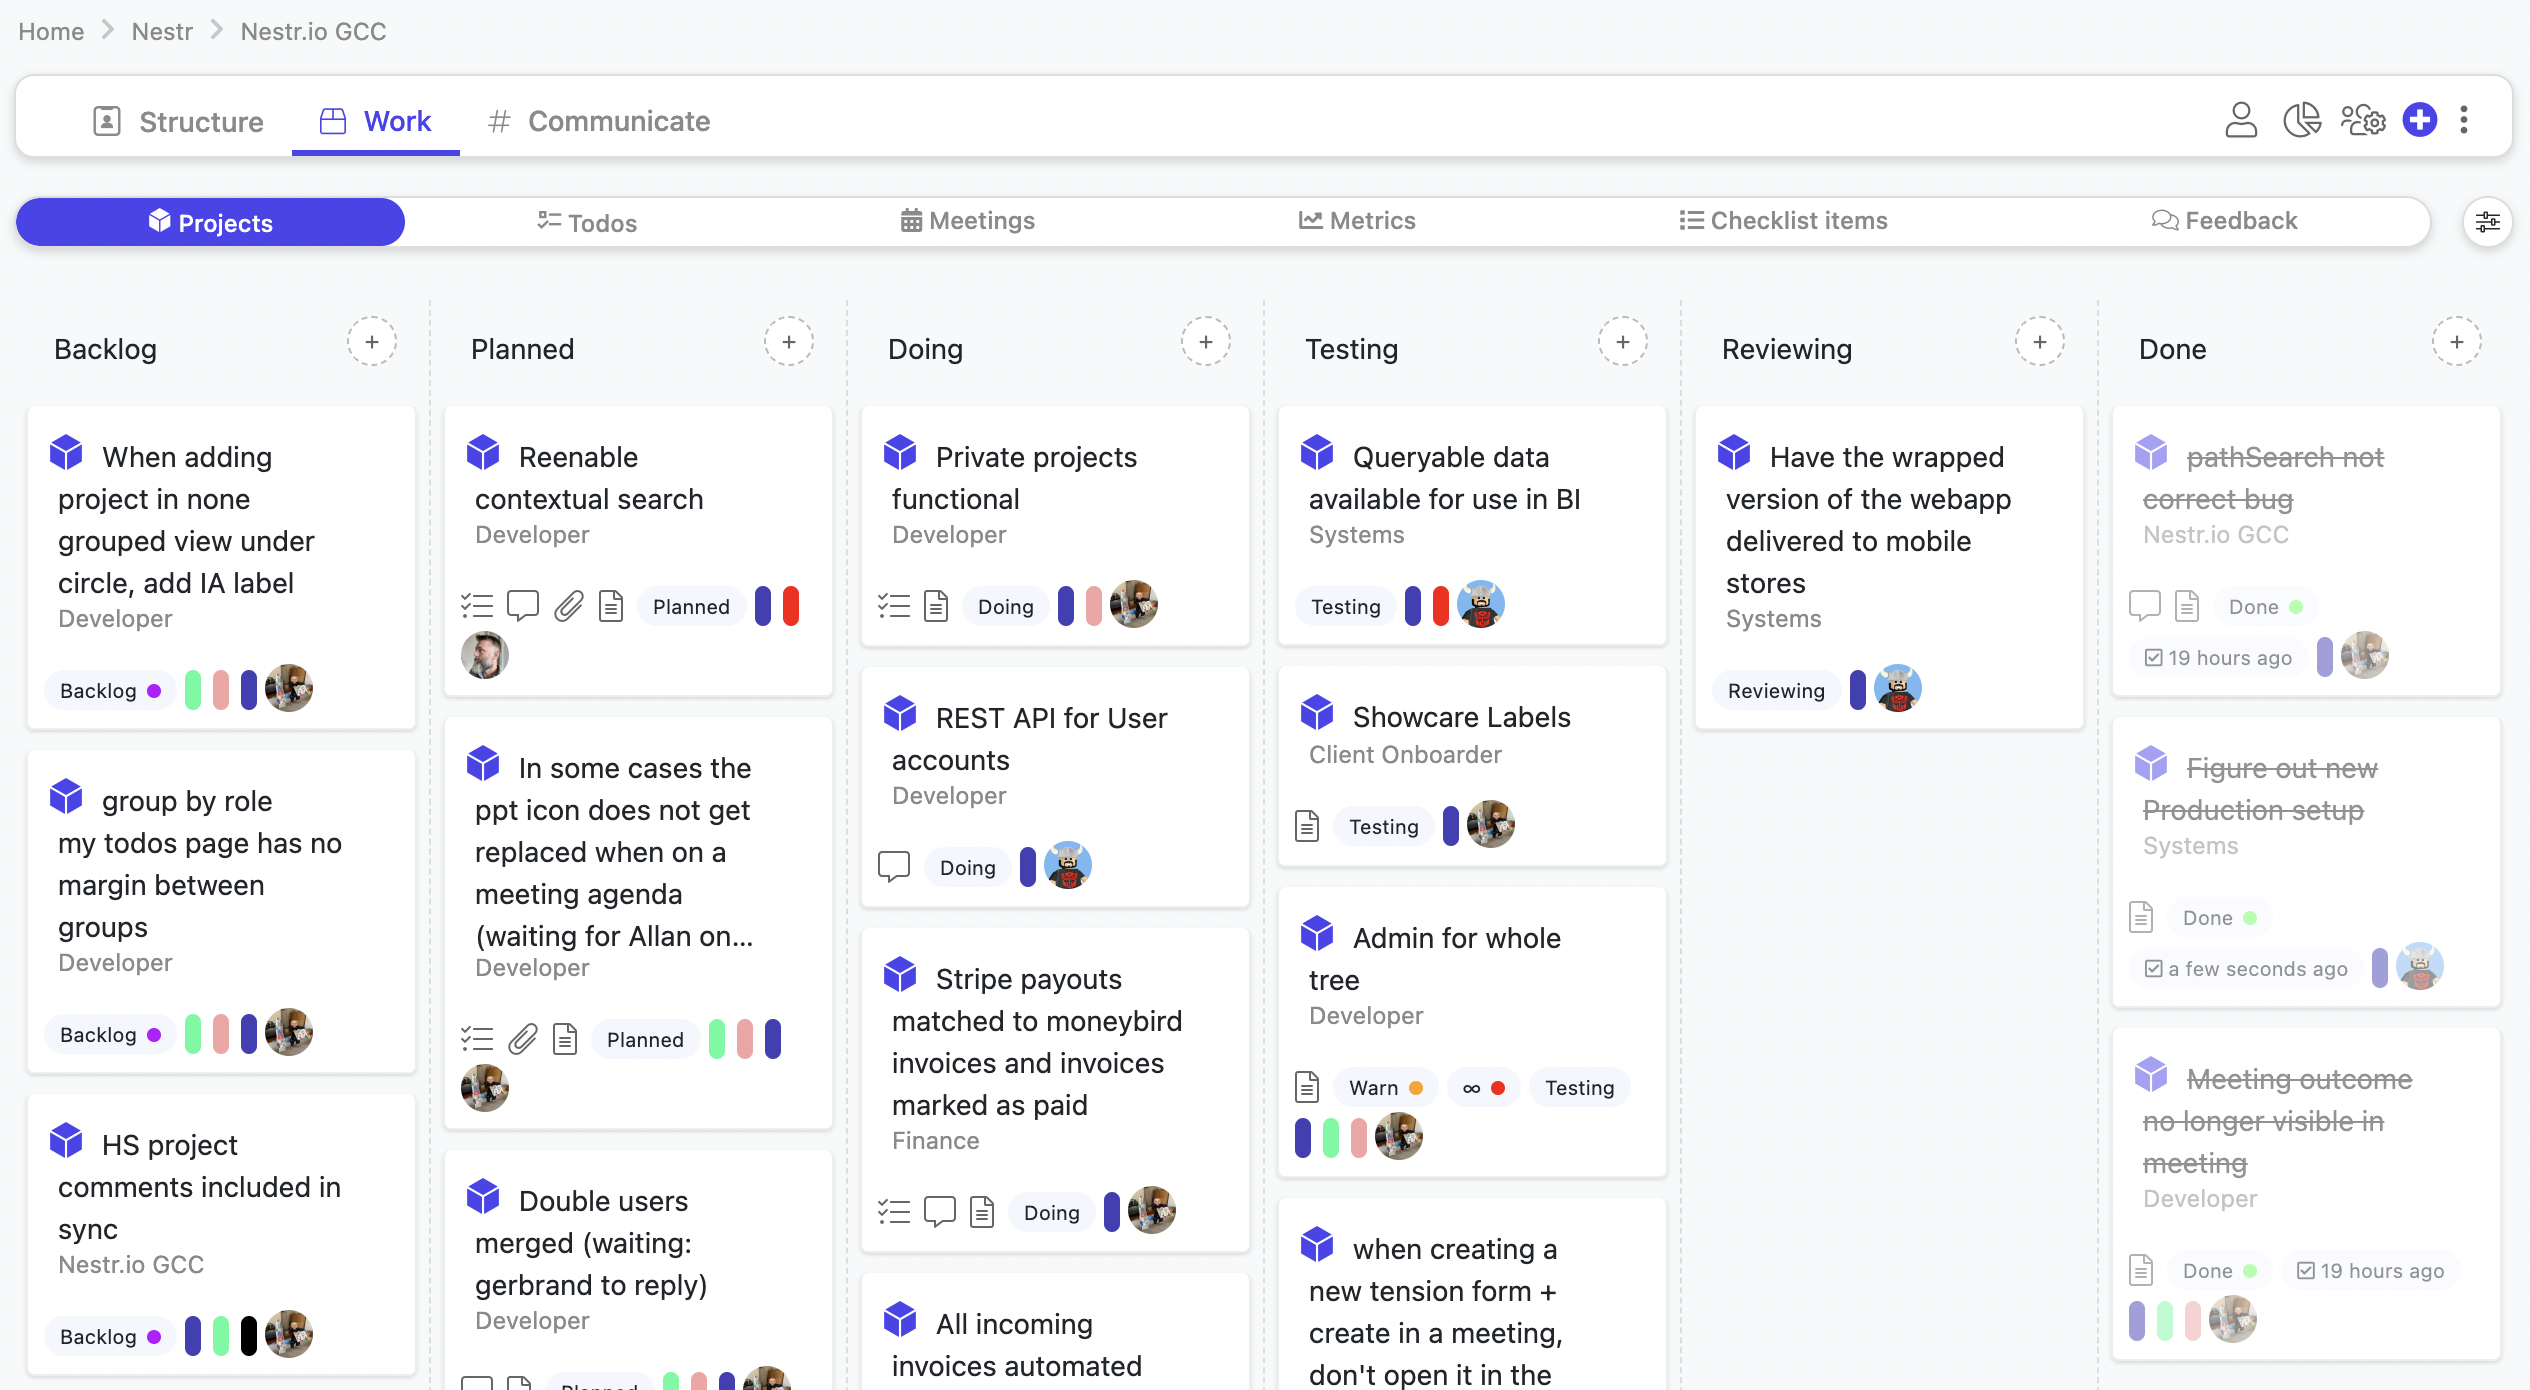
On top of adding fields to your own workspace labels, you can also change or add fields to some system labels. At current, you can update roles, circles and projects. If you add a field to any of them, they will show up throughout your workspace. you may also change the project status field and change the available options. This will in effect change the columns on your circle and role project boards as well. Here is a screenshot of a circle project board using custom columns.
We look forward to seeing how you will be using the power of labels in your workspace.
Happy Nesting!